This has been the most stimulating week I have had in ages. As long-time readers of this blog will know, I am was not an enthusiast about dyeing although I do partake from time to time. It is certainly a good long while since I did any natural dyeing, but I have been giving it a lot of thought and felt that the time was right to try it. And it just so happens that Michel Garcia was returning to Scotland to do a one week masterclass at Big Cat Textiles in Newburgh, where he is something of a regular on the schedule.


And if I am going to explore natural dyeing, I might as well go straight to the master, right? I am particularly interested in the way Michel investigates historical practices and establishes contemporary alternatives which are ecologically sustainable and non-polluting, such as plant-based mordants and processes which involve no mordanting at all.
I can’t possibly do justice to this course in a blog post, and even my pictures are pretty poor, but here is a taste of what we got up to (captions appear on mouseover). Success in results is entirely due to Michel and my excellent classmates!


We got through a lot of lemons… Our first dyebaths were made with green tea and lemons, and were used for dyeing protein fibres. The results were stunning.


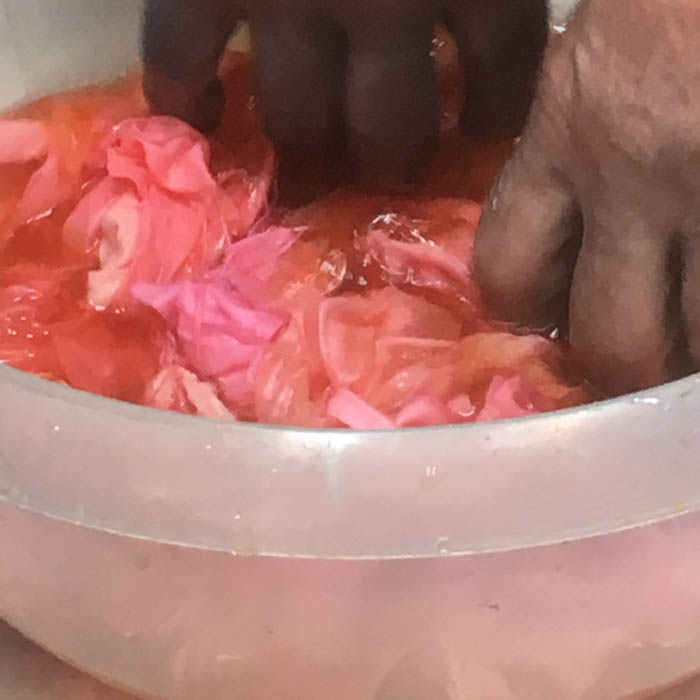
Then came a two-step process with symplocos leaves as our source of aluminium, followed by making indigo extract, dyeing with indigo and then dyeing with safflower. That amazing pink was worth the dozen rinses with our hands in cold water! (And it is definitely a help to work in groups of three, so your hands can thaw for two rinses)


We moved onto cotton, and made no-waste mordants to fix the colours. We had to speed up some processes to get our samples dry within the time constraints of the workshop. Alas my photos of the steamer made out of a towel rail, saucepan, funnel and stove pipe are too blurry to post.


Other processes not shown here: making cotton waterproof, using indigo, cutch, steam and the back of a spoon; testing plants for different types of tannin; the ‘Scottish vat’ made with malt syrup instead of fructose.
By the final day we were all quite dazed and stupid with tiredness. But even though I didn’t take everything in, I have a mass of samples and notes to keep me right. And I have the indigo vat! It came home with me, buckled into the boot of the car.


“Michel Garcia masterclass” was posted by Cally on 17 June 2017 at https://callybooker.co.uk


Sara
That sounds absolutely wonderful! Thanks for sharing it.
Cally
It was amazing! My head is whirling from so much new information.
Elisabet
Wonderful! Hope I can get back to Newburgh next year.
Cally
I wish I could take more of their classes! They have so many excellent tutors.
Jane Deane
Preaching to the converted, Cally! I’ve done a similar course with Michel, and a 3 day one, too. You can keep your George Cloonys, Garcia is my hero!
Cally
I know! I first heard about Michel’s ideas when I was on the JEC, and I am sure you had written one of the articles we published! I have heard nothing but positive reviews of his teaching and methods. So many important and timely developments.
Catherine Freeland
I’ve been sharing to the Highland Guild FB page, so members get a flavour, so to speak. With summertime, our very own Michelle, and Serena host dyeing days, which are wonderful. Serena makes a very beautiful purple from lichen, which I’ve never seen happen yet. At the moment, we’re not enjoying the sweltering temperatures you may be experiencing, so the idea of your indigo vat is making me fret. I have some linen trousers just crying out for over dyeing! We hope to see you again….
Cally
It was a fantastic week, Catherine – I feel really privileged to have had such a thorough class! I’m sorry you’re not getting the fine weather, but I have to say that I am mostly experiencing ours from my desk, since I have a lot of work to catch up on….
Marilyn Robert
Hi Cally, I became excited just reading about your workshop with Michel. I have taken workshops with him twice. We didn’t dye with safflower but the color is so gorgeous that I can’t wait to try. Did you get a yellow before the PINK? I wonder, how do you make cotton waterproof?
Marilyn
Cally
Yes, we did get yellow first, and that was the reason for all the rinsing in cold water – to dissolve the yellow and isolate the insoluble pink. It was a lot of effort, but the colour is just incredible. I particularly like it on silk where it is more salmony, though a little less vivid than on cotton.
The waterproofing is an elaborate process and I am not sure I got all the stages. Essentially it involves treating the cotton with tannins (we used cutch), then putting it in an indigo vat to oxidise and overdye. This makes it very dark, almost black. Then (I think) another dose of tannin, then egg white (originally hide glue, but basically a source of animal protein) and finally it is beaten with a hammer! Michel rubbed it with a spoon as we didn’t have a good surface for beating it on. Don’t quote me on this, however – I have sixteen pages of densely handwritten notes and I have only work through the first two pages so far!
Marilyn Robert
Hi Cally, Following up on my previous comment, why would you want to waterproof the cotton? I also have pages of notes, densely written, from dense ideas and practice with MG. In Japan I watched a man who was beating indigo dyed ramie cloth, producing a sheen. The ramie was grown there, on the island Miyako, made into thread, woven with kasuri (ikat) pattern, dyed and finished by beating with a long-handled wooden mallet onto a stone .
Cally
I don’t think any of us were particularly planning to put the waterproofing into practice, it was just an interesting development of the techniques we were learning and a fascinating insight into the way people innovated in times past. You never know, though, it might come in handy one day…!
charlotte609
These are the most amazing natural colors I have ever seen! Probably I would have liked this class as well, even I am, like you, not much into dyeing. Do you know anything about the lightfastness of therese dyes?
Cally
I believe they are pretty good: lightfastness is something that Michel has been very concerned with in his testing. One of his top recommendations was that steaming the yarn/fabric is beneficial in fixing the colour more strongly. In fact, I thought of you during the class, as we used stellaria as a source of tannins to fix madder!
Monika Auch
Hi just did an interview with Leentje van Hengelen from http://www.tinctoria.nl/nl . View her website and there will be an article in this summer’s edition of SDJ. As a weaver immersed in my own work I am not into loosing time over dyeing processes, too. But I have deep respect for this craft and ecological aims next to aesthetic values of plant colors. I will weave with natural dyed fiber any time – so bring it on!
Cally
Wow, I was just having a look at her website. Gorgeous colours! Don’t people have amazing skills?
Susanne
Hello Cally,
Thank you so much for sharing your experience and pictures.
I would love to know, how you buildt the steamer.
Would you tell me, how it works?
Greetings from Germany,
Susanne
Cally
Hi Susanne
I’m afraid I don’t have a clear enough recollection of the steamer to be able to describe the details. As I am always steaming yarn rather than fabric I just coil it up in a plastic wrap and place it in a vegetable steamer and that does the trick. However, I found these instructions online which seem to describe the sort of construction that Michel used at the workshop. I hope that helps.